
This page is dedicated to presenting tips used by our artists to make their job easier. If you have any tips or tricks you use, send them to webmaster@readingart.org and I will include them on this page.
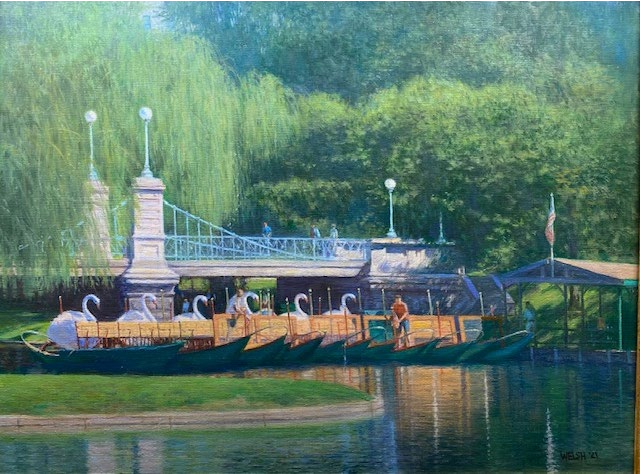
Bruce Welsh has sent a document full of tips that you can download and use. Here is an example of his work from the pamphlet. Click on the link below to download the information.
To sharpen my pastels, I scrape them over a piece of drywall screen (available at a hardware store). Not wanting to waste the pastels, I collect the dust to use for a wet or dry wash. Sometimes I add a little alcohol to the dust to form a stiff paste, roll it into a new pastel stick, and let it dry. I get some interesting colors using this technique.
Judy Nachazel, Ramona, California.
Rather than discarding the leftover paint on my oil palette at the end of a painting session, I scrape it up, mix it all together, and use it to tone a small canvas for my next painting. When mixing all the leftover color on a palette, I inevitably end up with a greenish gray that makes a good base coat and also helps to get the next painting started by eliminating the stark white canvas.
Linda Hobley, Dunham, Quebec
Using an old toothbrush to create sparkles and spatters is a wonderful trick to use with watercolor. But now let's bring this old dog into a new century and try out the electric toothbrushes. Dip the bristles in paint color and then press the "on" button while dragging a piece of board or an old credit card across the bristles. Voila! Electric splatter patterns! What's really great is these toothbrushes now have removable heads, so I can have one toothbrush head for working with watercolors and another exclusively for masking fluid. Not only is it versatile, it's also a lot of fun.
Elise M. Beattie, Bellingham, Washington
Shadow box type lighting has been used throughout art history in one form or another. Painters would hang a light cloth on the other side of the subject from the north light to "bounce" some of the light back into the shadows of the subject. Professional photographers do the same with their strobes to even off the values on their subjects. You can do the same with these simple items to get the look you want in your still life's or portraits.
The first item you will need is a Spot Light or "main light". It is the main light that you want your subjest to be seen in. In a still life or portrait, place the light to the right or left side at about a 45 degree angle. Also, arrange it up and down at a 45 degree angle. This set up is a starting point. You can "finess" the light in any direction to get the feeling you want.
The second item you will need is white 1/4-inch foamcore or equivalent. Place the foamcore on the opposite side of the subject from the light source. You want to bounce back some of that light into the shadow side of the subject. Move the board around until you see the results you want.
For more of a shadow box effect, usually used with still life's, place three pieces of foamcore around the subject, one on each side and one behind the subject. Tape them together to prop up. They should be sized to fit comfortably around, and taller than the subject, with good space all around.
Place the main light again to one side, but bounce it into the shadow box to your liking. This technique will give very subtle value difference. For more dramatic lighting, cut a 2-4 inch hole in one of the side boards, about 2/3's of the way up and situate the light so that it passes through the hole and onto the subject. Experiment with the light at different angles and different size holes.
As a helpful hint remember that colored boards will bounce back some of that color into the subject.
Good photographic type spotlights can be bought at any professional photo store.
From Margaret Geanisis.
Margaret makes small, postcard sized sketches to use as reference material when she does her full sized watercolors. The use of sketches instead of photographs helps her capture her impressions of the scene instead of just recording the facts. Also, the act of using your hand to draw the scene helps your memory record what you saw. Simply snapping a photograph does not do that.
From Ron Straka.
Ron Straka uses a palette which is a neutral color and which is a middle value in the gray scale. That way he can tell more accurately how the value of the color he is mixing will appear on the canvas than he could if he used a white palette.
From the Mixed Media.
Wood Carvers have to keep their tools sharp so they must maintain their stones to do so. Proper care and maintenance of sharpening stones ensures long life and good results. Cover oilstones and waterstones when not in use to prevent dust buildup. When an oilstone gets clogged with oil and metal particles, clean it thoroughly with paraffin oil and coarse burlap.
Always store waterstones in water. Vinyl storage boxes are available to keep them moist.
Sharpening stones have a tendency to wear down at their center from the constant wear. Keep your oilstone true by flattening it on a sheet of glass with lubricant and carborundum powder
A waterstone can be flattened by rubbing it with a piece of wet 200 grit silicon-carbide paper taped onto a piece of glass.
Better Homes and Gardens, Meredith Corp.
From the Mixed Media.
The Liquitex "Acrylic Book" is a 64 page booklet packed with a lot of information on acrylic paints, applications, and techniques. Some of its topics include the different grading of pigments, color mixing palettes, gesso applications, surface preparation, mediums, varnishes and much more. It is free and downloadable as a pdf file at www.liquitex.com/products/edu.html. You will need Adobe Acrobat Reader, which is also downloadable from the site.
From the Mixed Media.
One artist friend says he slips half of a small bar of ivory soap into a 35mm plastic slide box for cleaning his brushes or soaping his brushes before using masking fluid. "Since the soap is contained " he says, "it does not leave its mark everywhere and can even be put away wet."
From the Mixed Media.
How to make a great paint splatter tool. A craft hobbyist showed me this.
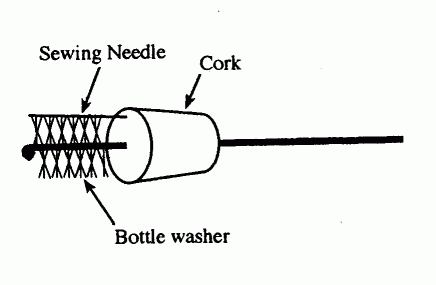
Purchase a small wire-handled bottle washer and a cork at a kitchen utensil supply store. The large end of the cork should be a bit larger in diameter than the bristles of the bottle washer. Carefully drill a small hole through the cork center. enough to fit quite snugly over the wire handle. Stick a two-inch sewing needle into the end of the cork pressing against the bristles. Dip the bristles in the paint; hold onto the cork, making sure you turn the brush handle in the proper direction! To get the feel, try it with clean water first. The lighter the pressure on the bristles, the finer the splatter. See diagram.
This item may also be bought through Kemper Tools, Chino, CA, www.clayfactoryinc.com.